How to Create the Perfect Lighting Setup for an Interview
lensheadmedia
on
March 5, 2025
Lighting is one of the most crucial aspects of filming a high-quality interview. The right lighting setup can elevate the production value, highlight your subject’s features, and create the perfect mood for your video. Whether you’re filming in a studio or on location, a carefully crafted lighting plan is essential for achieving a professional and visually appealing result. Here’s how to create the perfect lighting setup for an interview.
1. Understand the Basics of Lighting
Before diving into the details, it’s important to understand the three primary types of lighting used in most interview setups:
- Key Light: This is the main light source that illuminates your subject. It should be positioned at a 45-degree angle from the camera, either to the left or right, to create natural-looking shadows and depth.
- Fill Light: The fill light helps soften the shadows created by the key light, ensuring the subject’s face is well-lit without harsh contrast. It’s typically placed on the opposite side of the key light, often at a lower intensity.
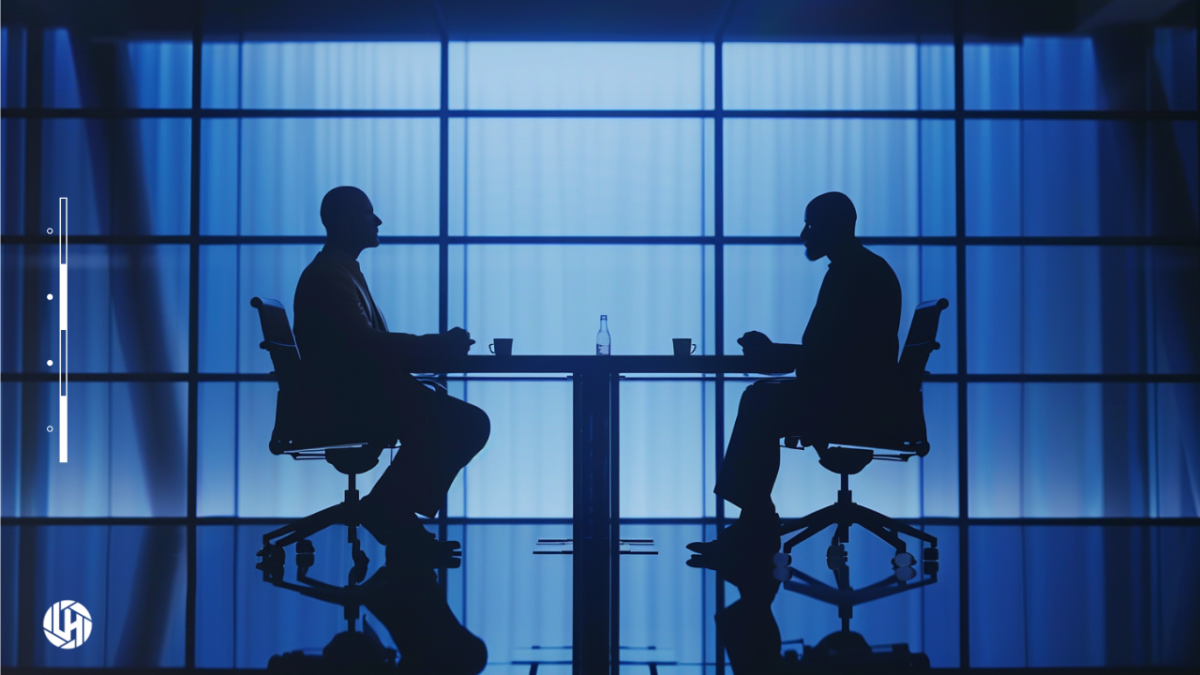
- Back Light (or Hair Light): This light adds separation between the subject and the background, helping to create a sense of depth. It’s usually positioned above and behind the subject, casting a subtle glow around the shoulders and hair.
These three lights (key, fill, and back) work together to create a balanced, well-lit scene.
2. Choose the Right Light Sources
There are a lot of options when looking for film lights to use in your interview. Often interviews go for a clean, flattering look that uses soft light sources that eliminate harsh shadows, but this isn’t the only option. Here are a few lighting options to consider:
- Softboxes: These are ideal for diffusing light evenly and creating soft, flattering light. Softboxes can be used for both key and fill lights, offering a gentle, even illumination that reduces unflattering shadows.
- LED Panels: Versatile and easy to control, LED panels are great for providing consistent and adjustable light. They are often used for both key and fill lighting and are particularly effective in tighter spaces due to their slim design.
- Open Faced Lights: A less popular lighting choice, open faced lights like fresnels, offer direct and hard lighting. Offering a much more dramatic look, they can be used when your interview needs to be more stylized or when your setup requires more light than a softer source can provide.
Choose the light source based on the mood you want to create and the environment you’re working in. Softer lighting works best for most interview setups, but harder lighting can be used for a more dramatic look when needed.
3. Position Your Lights for Natural Look
Proper light positioning is key to achieving a natural look for your interview:
- Key Light Placement: Place your key light at about a 45-degree angle to your subject, slightly above eye level. This position mimics natural sunlight and helps create flattering shadows that define the subject’s facial features.
- Fill Light Positioning: Position your fill light opposite the key light, but at a lower intensity. The fill light should be softer and used to reduce deep shadows without eliminating them completely. Be cautious not to overfill the shadows, as this can result in a flat, lifeless image.
- Back Light Placement: Place the back light behind and slightly above your subject to create a halo effect around their head and shoulders. This helps separate them from the background, adding depth and dimension to your shot. The back light should be softer than the key light to avoid overwhelming the subject.
Make sure to experiment with the positioning of your lights and adjust their intensity until you achieve the desired effect.
4. Control the Background
The background can make or break an interview setup. Proper lighting can help separate your subject from the background, giving your video a more professional and polished look:
- Use background lights to subtly illuminate the background, adding texture or color without distracting from the subject.
- If you’re working with a neutral or plain background, you may want to use a colored gel or background light to give it more visual interest without taking attention away from the interviewee.
- For a more dramatic effect, you can use shadows to create contrast, but make sure the background isn’t too busy or cluttered, as it may distract from the subject.
5. Avoid Common Lighting Mistakes
Here are a few common mistakes to avoid when setting up your lighting:
- Overexposure: Make sure that your lighting isn’t too harsh. Overexposed footage can look unprofessional and uncomfortable to watch.
- Uneven Lighting: Avoid one side of your subject’s face being too bright or too dark. This can cause distractions and create an unnatural look.
- Flat Lighting: Relying too much on fill light can eliminate shadows, making the subject appear flat. Remember, shadows create depth and interest in the shot.
- Unwanted Reflections: If the subject is wearing glasses, make sure that none of the lights cause reflections that obstruct their eyes. This can be avoided by adjusting the angle of the key or fill lights.
6. Adjust for the Mood
Lighting can drastically affect the mood of your interview. If you want a warm, inviting feel, try using warmer light temperatures (around 3000K). For a more neutral or modern look, stick to cooler light temperatures (around 5600K), which mimic daylight.
To create a more dramatic atmosphere, consider adding low-key lighting, where the key light is brighter, and the fill light is minimal, creating high contrast and deep shadows.
7. Test and Refine Your Setup
Before you start filming, always do a test shot to ensure your lighting setup is working as intended. Adjust your light intensity and positioning as needed. Check for any unwanted shadows or reflections and ensure that your subject is well-lit from all the right angles.
Conclusion
Lighting is one of the most powerful tools at your disposal when filming an interview. By understanding the basics of lighting and carefully setting up your lights, you can create a professional, visually appealing setup that enhances your subject’s features and supports the tone of your interview. Whether you’re filming in a studio or on location, the right lighting setup can make a world of difference in your final video.
Ready to elevate your interview videos? Contact us at Lens Head Media to learn more about our expert video production services!
- Category: Video Production
- Tag: corporate video production, film studio, interviews, video production